User Manual – How to Use Online Chat?
The online chat has two modes of operation – “Offline” and “Online”.
1. Realtor is offline.
- If there is no agent in the chat admin panel, offline mode is automatically turned ON.
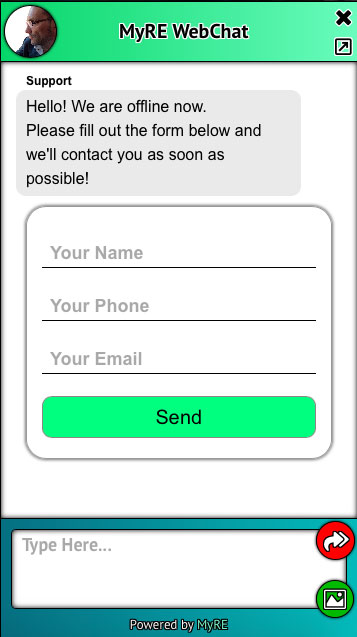
- In this mode, the visitor cannot chat. Instead, they are presented with a contact form where they can enter their contact information and send a request to the agent.
- When the visitor sends a request, the agent receives an email with the visitor’s contact information. The request is also duplicated on the main page of the chat admin panel.

2. Realtor is online.
- When an agent is logged into the chat admin panel, his status is automatically set to “online”. In this mode, a visitor can see the online chat widget and can write a message to the agent, send an image or a PDF document.
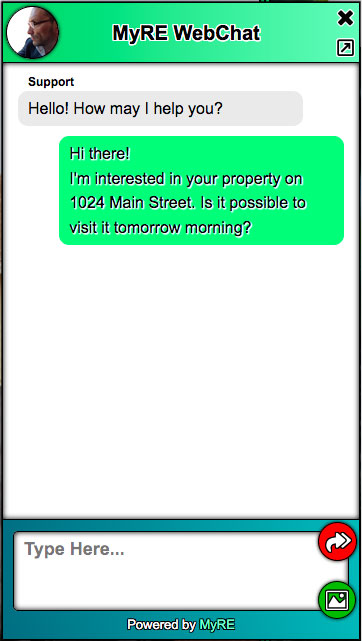
- When the visitor sends a message to the agent, then:
- If the agent has the Live Chats tab open and the Visitor Chat window is open, the message will appear in the window;
- If the “Live Chats” tab is open, but the agent is chatting online with another visitor – the chat icon with the incoming message will change color with the label “NEW”. By clicking on this icon, the agent can see the new message.
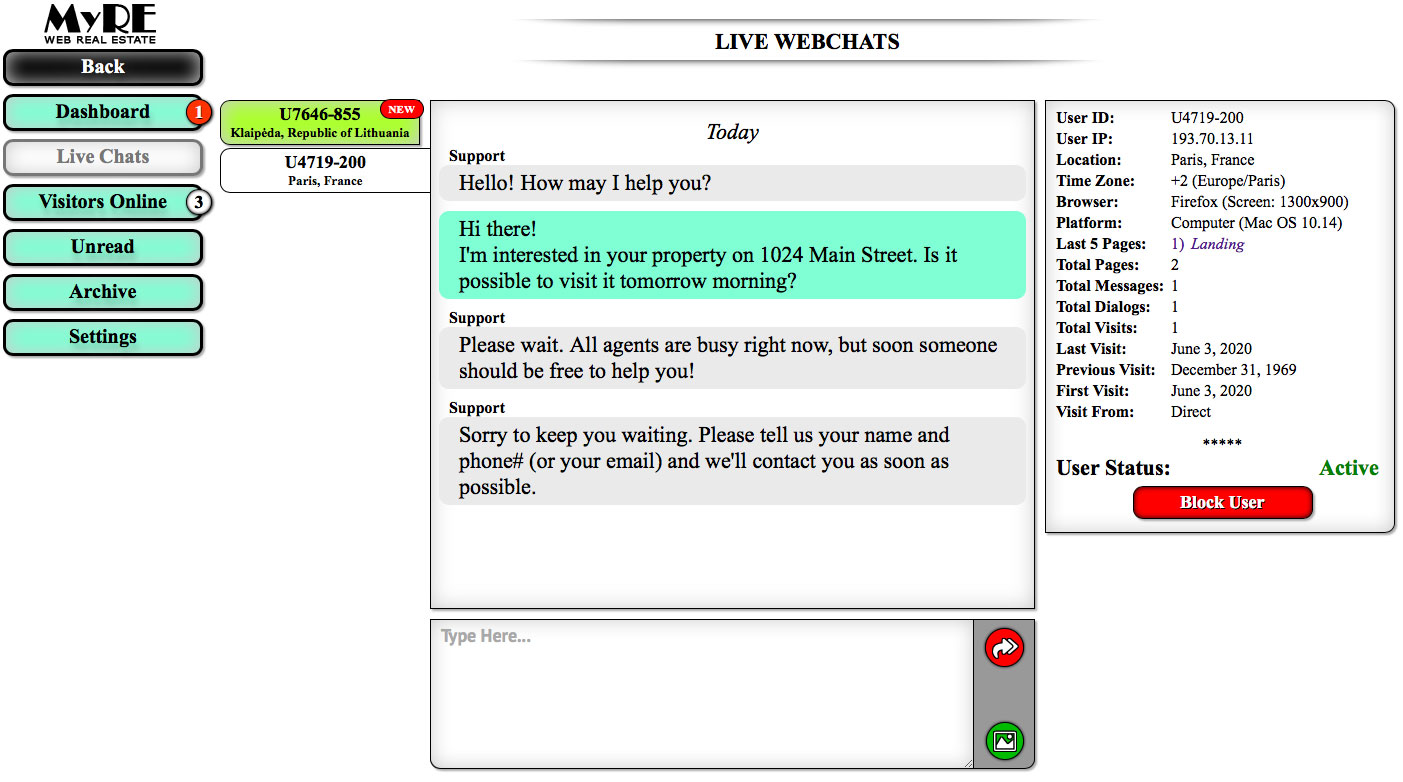
- If the agent has another tab open, the message will appear in the chat admin panel with a sound warning of a new incoming message. A tab for switching to a new message will also be highlighted (see above).
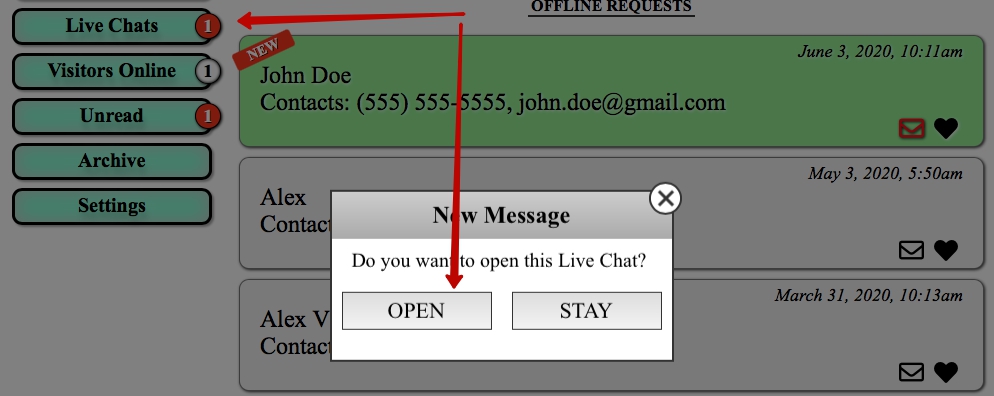
- The agent, who is on the “Live Chats” tab, can see all active conversations and, by selecting one of the conversations, write a reply to the visitor, transfer an image or a document.
Step 0 – How to log in to the admin panel.
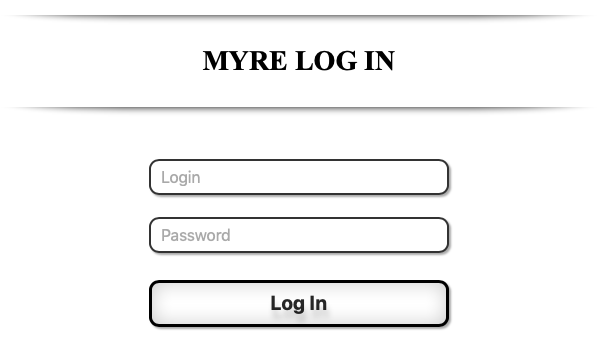
- Add /myre-admin/ after your domain name in the address bar of your browser and click Enter;

- Input your “Login” and “Password” (See detailed login instructions HERE);
- Click on the “WebChat” tab in the left menu.
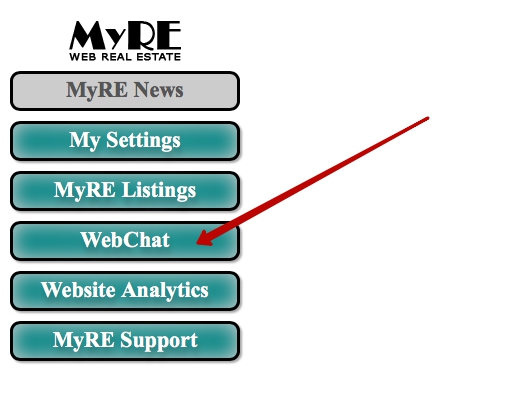
Step 1 – Admin panel features.
#1 – “Dashboard”
- Here you can see a list of “OFFLINE REQUESTS” (if any).
- There are three different statuses – “Favorite”, “Unread”, “Read”. You can also change the status from your page.
- Requests sorted by status (primarily) and date received.

#2 – “Live Chats”
- This is the page that displays all active chats.
- By default, you see the most recent message first.
- On the left side of the page you will see the icons of all the active chats. Clicking on one of these icons will activate that particular chat.

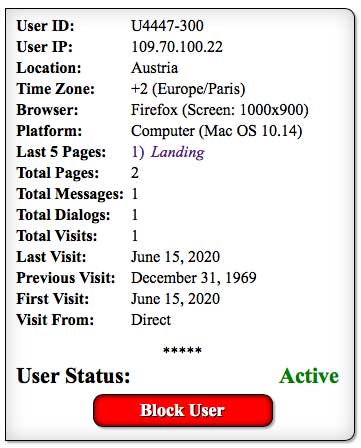
- On the right side of the active chat you will see a block with visitor information (location, IP address, etc.).
- In the middle you can see the history of all messages between you and the visitor.
- The messages that are not written today have a time stamp and date.
- Below the messages, there is a field for communication between you and the site visitor. Type your message and click “Enter” – the message will be sent. The same message will be sent if you click on the red button. The combination “Shift + Enter” will move the text to a new line. If you want to send a picture or a PDF document, click on the green button and select the desired file. The maximum size of the transferred file is 10Mb.

- In the information block (on the right) there is a “Block User” button. By clicking it you will block the visitor and the chat will disappear. He will no longer be able to send you messages (from his current device).
#3 – “Visitors Online”
- On this page, you can see all the visitors who are currently browsing your website.
- Each visitor is displayed as a block with information about their location and the device they are using to view your website.

#4 – “Unread”
- On this page, you will find the most recent messages that you haven’t read yet.

- Clicking on it will take you to a special page where you can see all the messages and enter a reply to the message.
#5 – “Archive”
- On this page, you will find all chats with visitors who have ever written to you.
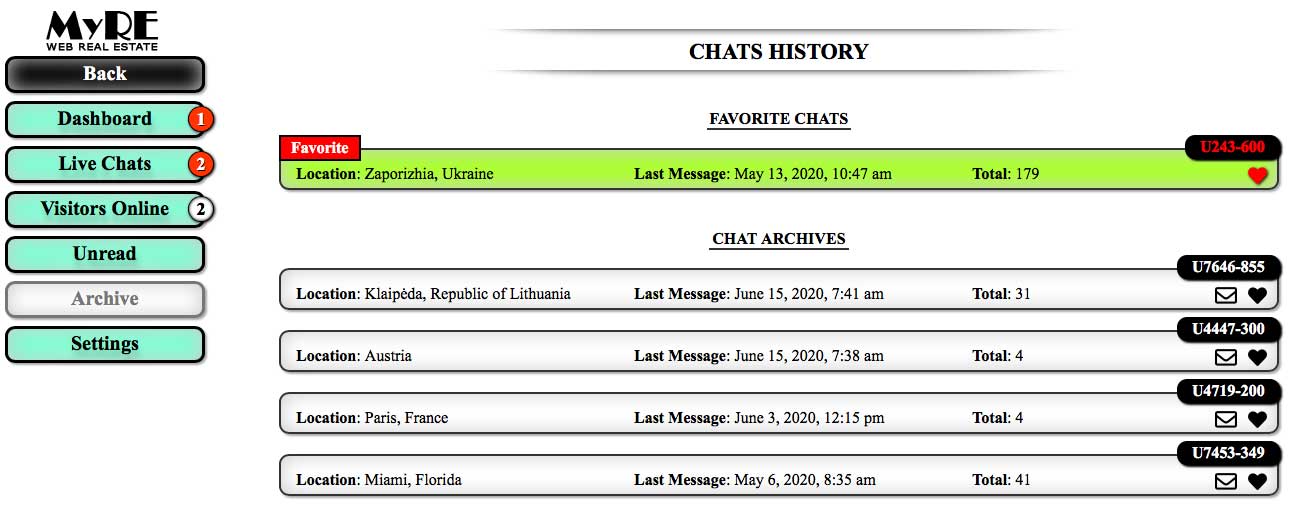
- Chats have 3 statuses – “favorite”, “unread”, “read”. You can change them yourself.
- The chats are sorted by status (first) and the date they were received.
- Click on a chat block to read the entire message.
- You can reply to archived chats with favorite and unread statuses directly from this page.
- Also on this page you can block and unblock a visitor using the “Block User” and “Unblock User” buttons (while the messages remain intact).
- You can delete all messages by clicking on the “Delete Chat” button.
#6 – “Settings”
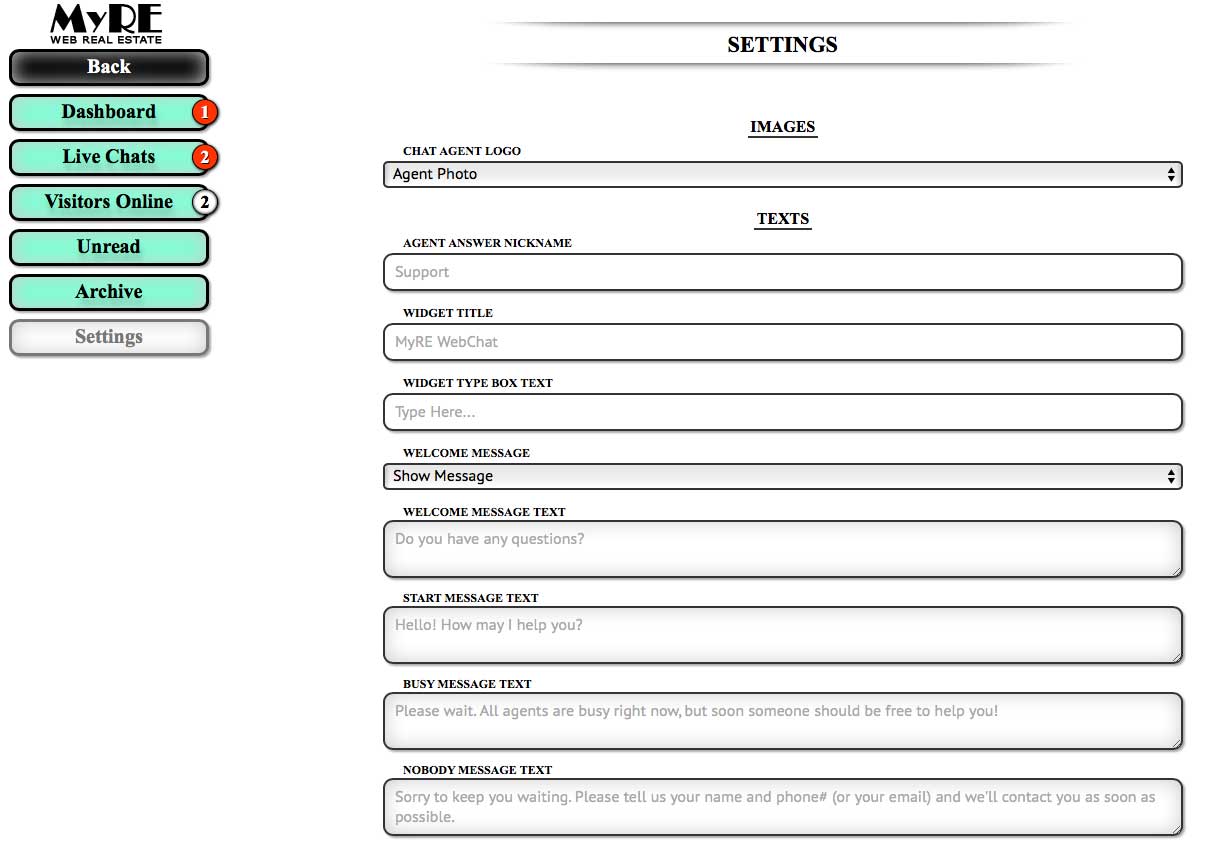
- On the page you can:
- set your headshot for the chat widget;
- change the notification messages that are displayed to the visitor;
- set timers for specific chat events;
- select a sound for new messages;
- configure SMTP to send messages to your e-mail when you receive new messages or requests.
Step 2 – how does the user’s chat work.
- When a visitor visits the website for the first time, the script analyzes the visitor and if it is not a bot, it creates a special user identifier and saves the data for storage.
- If the agent is online and “active”:
- After a certain time (set in the settings), the visitor will see a “welcome message” if he hasn’t opened the chat before.

- If the visitor does not open the chat, then after a certain time the chat will open itself and there will be “First Message” (you can change it in your settings).

- When the visitor closes the chat, the “Welcome Message” and “First Message” will no longer appear today.
- As you move through the pages of the website, the chat will remember the status from the previous page. In other words, if the chat was opened on the previous page, it will be automatically opened on the new one.
- After the visitor writes a message to the agent, a timer starts which, after a certain time (if the agent does not answer or starts answering during this time), displays the “Busy Message” for the visitor, informing him/her that the agent is a little busy and that he/she should wait (you can change this with your own message). After the “Busy” message is displayed, a timer starts which, if the agent is still inactive, displays the “Nobody” message with a request to inform the visitor’s contacts so that the agent can contact the visitor later (you can change this with your own message).

- After a certain time (set in the settings), the visitor will see a “welcome message” if he hasn’t opened the chat before.
- When an agent is not active (offline):
- The “Welcome message” does not appear and the chat does not open by itself.
- When a visitor opens a chat, they will see a feedback form.
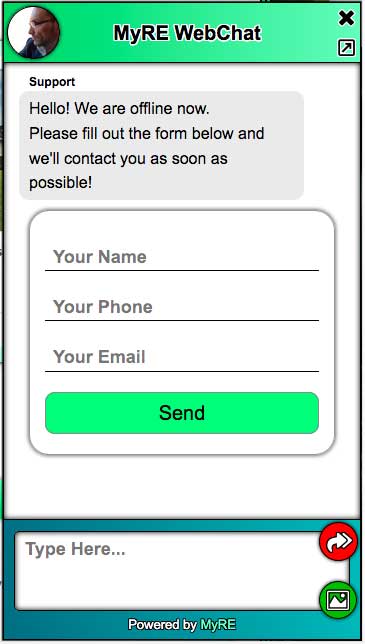
- When the visitor fills in and submits a feedback form, he can see a special message set in the settings after submitting. The second form can only be sent by completely closing and reopening the website to avoid spam.

